
Configure authd for identity providers
This guide shows how to configure identity brokers to support authentication of Ubuntu devices with authd and your chosen identity provider.
Logging in multiple users with authd
By default, the first user to authenticate and log in to a machine becomes the “owner” and only they are allowed to log in.
For other authenticated users to log in, they must first be added as an “allowed user”.
The steps you need to follow when allowing more users are outlined in configure allowed users on the current page.
Broker discovery
Copy the .conf file from the broker snap to the directory used to declare
which brokers are available on the system:
sudo cp /snap/authd-msentraid/current/conf/authd/msentraid.conf /etc/authd/brokers.d/
sudo cp /snap/authd-google/current/conf/authd/google.conf /etc/authd/brokers.d/
sudo cp /snap/authd-oidc/current/conf/authd/oidc.conf /etc/authd/brokers.d/
Note
Several brokers can be enabled at the same time.
Application registration
This section demonstrates registering an OAuth 2.0 application that your chosen broker can then use to authenticate users.
Register a new application in the Microsoft Entra admin center. To register a new application, select the menu :
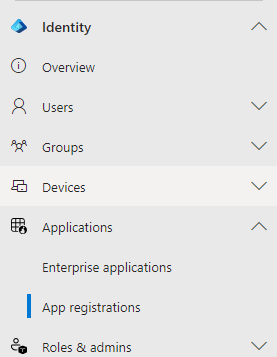
Then New registration:
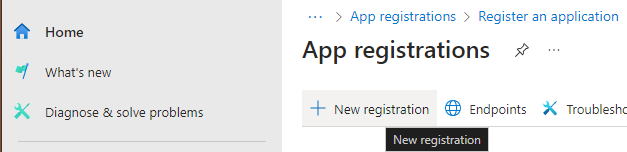
Choose a name for the application, for example “Ubuntu authd”, and the appropriate account type for your use case. Then click on Register to create the application.
Once registered, note the Application (client) ID and the
Directory (tenant) ID. These IDs correspond to the <CLIENT_ID> and
<ISSUER_ID>, respectively, which are used in the next section.
In , set the following Microsoft Graph permissions:

Ensure the API permission type is set to Delegated for each permission.
The GroupMember.Read.All permission needs admin consent. Click on Grant admin consent for <TENANT_NAME> to provide this consent.
If you plan to use the device code flow, you also need to allow public client flows. In , ensure that Allow public client flows is set to Enabled. This isn’t required if only the Entra authentication flow is used, since it authenticates through the Microsoft Broker App.
The Microsoft documentation provides detailed instructions for registering an application with the Microsoft identity platform.
Redirect URI
If you plan to use the device registration feature (see configure device registration), you need to configure a redirect URI for the application. Go to , click on Add Redirect URI, then choose Mobile and desktop applications and select the following URI:
https://login.microsoftonline.com/common/oauth2/nativeclient
To register a new application in Google IAM, go to the Credentials page.
Click .
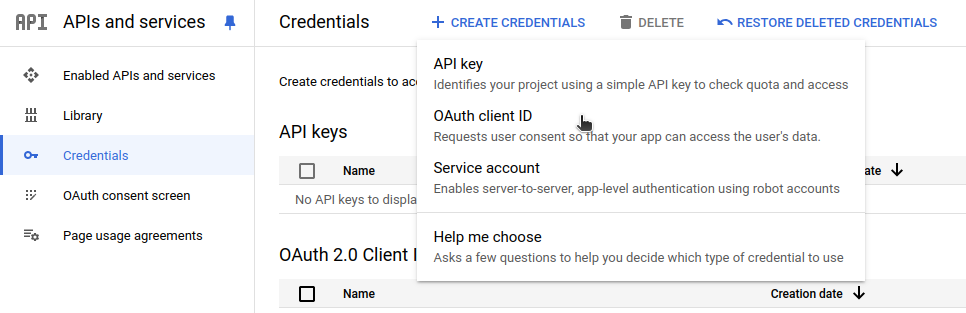
Select the TVs and Limited Input devices application type.
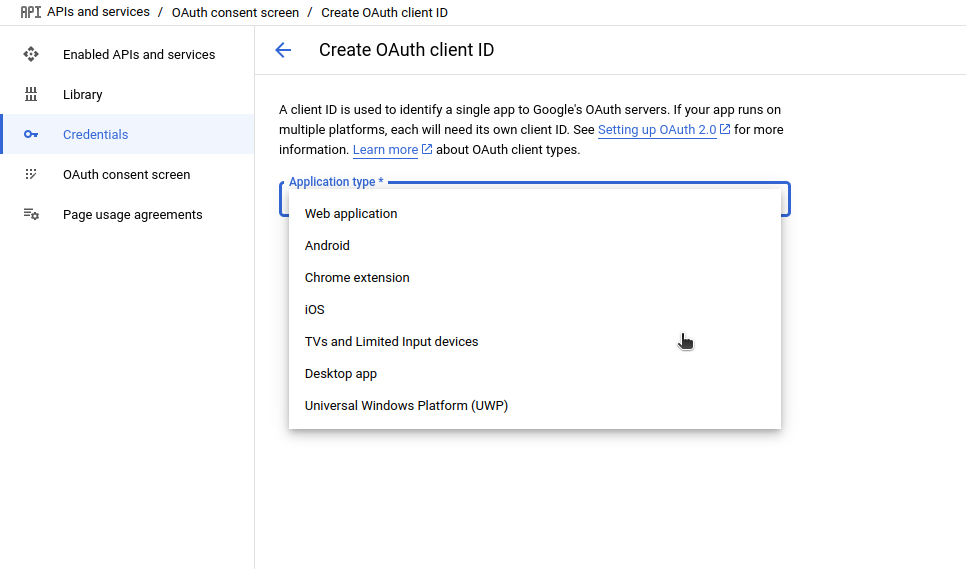
Name your OAuth 2.0 client and click Create.
Your app’s Client ID and Client secret will be shown on the page, store them
somewhere as you will need them in the next step.
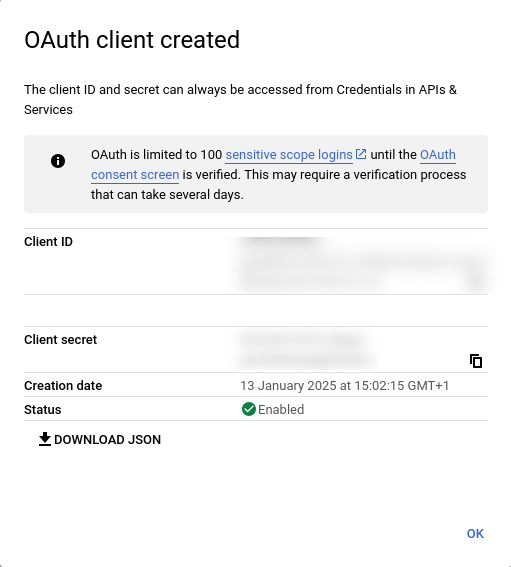
For more detailed information please refer to the OAuth 2.0 for TV and Limited-Input Device Applications documentation.
Register a new client in Keycloak. Go to and create the client.
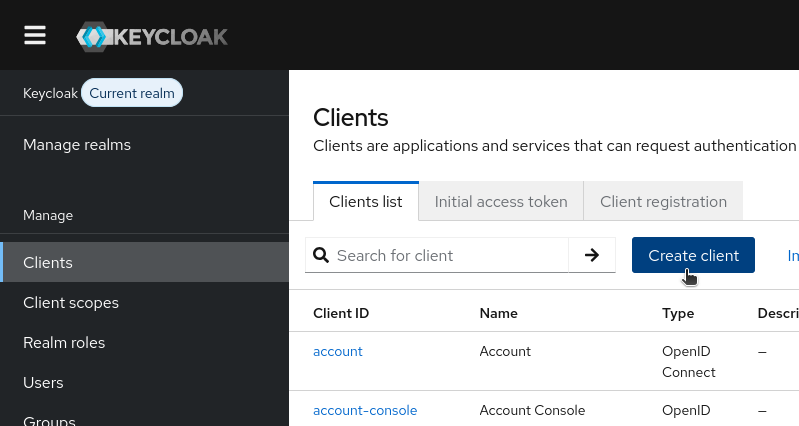
Configure the client as follows:
General settings
Set the client type to OpenID Connect.
Pick a valid client ID, for example,
ubuntu-authd. This corresponds to the<CLIENT_ID>which is used in the next section.
Capability config
(Optional) Enable client authentication
Enable the OAuth 2.0 Device Authorization Grant authentication flow.
Login settings
No need to change anything here.
Finally, click on Save to create the client.
If you enabled client authentication, find the client secret in the
Credentials tab. This corresponds to the <CLIENT_SECRET> in the
next section.
Set email addresses for users
Make sure that all users who should be able to log in through this broker have an email address configured in Keycloak.
Broker configuration
Now we can configure the broker. Note that different brokers can require different configuration data.
To configure Entra ID, edit /var/snap/authd-msentraid/current/broker.conf:
[oidc]
issuer = https://login.microsoftonline.com/<ISSUER_ID>/v2.0
client_id = <CLIENT_ID>
To configure Google IAM, edit /var/snap/authd-google/current/broker.conf:
[oidc]
issuer = https://accounts.google.com
client_id = <CLIENT_ID>
client_secret = <CLIENT_SECRET>
To configure the authd-oidc broker for Keycloak, edit
/var/snap/authd-oidc/current/broker.conf:
[oidc]
issuer = https://<host>/realms/<realm-name>
client_id = <CLIENT_ID>
If you enabled client authentication, you also need to add the client secret:
client_secret = <CLIENT_SECRET>
Force remote access check with the identity provider
By default, remote authentication with the identity provider only happens if there is a working internet connection and the provider is reachable during login.
To ensure that user access permissions are always checked with the identity provider during login, even when the provider is unreachable, enable the check as follows:
[oidc]
...
force_access_check_with_provider = true
This check works by forcing a token refresh during login, which fails if the user does not have the necessary permissions in the identity provider.
Warning
In some cases, forcing the access check may prevent login, such as when there are network issues.
Additional information on the forced access check is provided in the security overview.
Configure allowed users
The users who are allowed to log in (after successfully authenticating via the
identity provider) are configured in the users section of the
/var/snap/authd-<broker_name>/current/broker.conf file:
[users]
## 'allowed_users' specifies the users who are permitted to log in after
## successfully authenticating with the Identity Provider.
## Values are separated by commas. Supported values:
## - 'OWNER': Grants access to the user specified in the 'owner' option
##            (see below). This is the default.
## - 'ALL': Grants access to all users who successfully authenticate
##          with the Identity Provider.
## - <username>: Grants access to specific additional users
##               (e.g. user1@example.com).
## Example: allowed_users = OWNER,user1@example.com,admin@example.com
#allowed_users = OWNER

## 'owner' specifies the user assigned the owner role. This user is
## permitted to log in if 'OWNER' is included in the 'allowed_users'
## option.
##
## If this option is left unset, the first user to successfully log in
## via this broker will automatically be assigned the owner role. A
## drop-in configuration file will be created in broker.conf.d/ to set
## the 'owner' option.
##
## To disable automatic assignment, you can either:
## 1. Explicitly set this option to an empty value (e.g. owner = "")
## 2. Remove 'OWNER' from the 'allowed_users' option
##
## Example: owner = user2@example.com
#owner =
By default, the first person to log in to the machine is automatically
registered as the owner. If you wish to override this behavior then specify a
list of allowed users with the allowed_users option, while omitting the
OWNER keyword:
allowed_users = person1@email.com,person2@email.com
Alternatively, you can directly register someone as the owner by using the owner
option:
owner = your@email.com
Explicitly setting an empty owner, has the same effect as omitting the OWNER
keyword in allowed_users:
owner = ""
Only my first logged-in user has access to the machine?
By default, the first logged-in user is defined as the “owner” and only the owner can log in. To allow more users to log in, update the list of allowed users.
If an administrator is the first to log in to a machine and becomes the owner,
they can ensure that the next user to log in becomes the owner by removing the
20-owner-autoregistration.conf file:
sudo rm /var/snap/authd-msentraid/current/broker.conf.d/20-owner-autoregistration.conf
sudo rm /var/snap/authd-google/current/broker.conf.d/20-owner-autoregistration.conf
sudo rm /var/snap/authd-oidc/current/broker.conf.d/20-owner-autoregistration.conf
This file is generated when a user logs in and becomes the owner. If it is removed, it will be regenerated on the next successful login.
Configure the home directory location
By default, home directories for new authd users are created under /home, in
the format /home/<username>.
You can change the base directory for new users’ home directories with the
home_base_dir option in the users section of the broker configuration file:
[users]
## The directory where home directories are created when users log in for the first time.
## Paths are created in the format <home_base_dir>/<username>
home_base_dir = /home
Note
Changing the base directory only affects users logging in for the first time.
Configure user groups
Some brokers support adding users to groups that are configured in the identity provider. Group membership can be used to manage user privileges, including sudo and docker rights.
See the group management reference for more details.
In addition, you can configure extra groups for authd users.
On login, the users are added to these groups automatically.
Specify any extra groups in the users section of the broker
configuration file:
[users]
## A comma-separated list of local groups which authd users will be
## added to upon login.
## Example: extra_groups = users
#extra_groups =
There is also an owner_extra_groups option for specifying additional local
groups, to which only the user with the owner role
is added:
## Like 'extra_groups', but only the user assigned the owner role
## will be added to these groups.
## Example: owner_extra_groups = sudo,lpadmin
#owner_extra_groups =
Configure device registration
When using the Microsoft Entra ID broker, you can enable automatic device registration, which allows administrators to manage registered devices in the Microsoft Entra admin center.
Automatic device registration can be enabled with the register_device
option in the msentraid section of the broker configuration file:
[msentraid]
## Enable automatic device registration with Microsoft Entra ID
## when a user logs in through this broker.
##
## If set to true, authd will attempt to register the local machine
## as a device in Entra ID upon successful login.
##
## If set to false (the default), device registration will be skipped.
#register_device = false
Changing this option forces re-authentication
When changing this option, users are forced to re-authenticate on the next login.
Set the redirect URI
Make sure that the application in the Microsoft Entra admin center has a redirect URI configured as described in Redirect URI.
The Google IAM broker does not support device registration.
The authd-oidc broker does not support device registration.
Configure authentication flows
The [flows] section of the broker configuration file controls which
authentication flows are offered to the user at login.
Entra authentication flow
If entra_auth is omitted, it follows the register_device setting: it is
enabled when device registration is enabled and disabled otherwise. New Entra
broker configurations explicitly set entra_auth = false. After enabling
device registration or configuring a client secret, enable the flow explicitly:
[flows]
entra_auth = true
When entra_auth is enabled, users can sign in with their Entra ID password
followed by an MFA challenge, such as a number-matching prompt or a one-time
code, or use a passwordless method instead, such as a FIDO2 security key or
passwordless sign-in in the Microsoft Authenticator app.
If a security key challenge is expected but no key is connected, login falls back to the device code flow when it is enabled.
Local password after a passwordless login
Users who log in without entering their Entra ID password are asked to create a local password at the end of their first login. Only a salted hash of this password is stored for subsequent offline logins.
See Authentication flows for a full description of the sign-in steps and their requirements.
Device code flow
The device_code flow is enabled by default. When it is enabled, the user is
presented with a device code and a URL to visit in a browser to complete
authentication. This is the standard OAuth 2.0 Device Authorization Grant flow.
At least one authentication flow must be enabled. A configuration that explicitly disables both flows is invalid, and the broker fails to start.
The Google IAM broker only supports the device code flow, where the user visits a URL and enters a code to complete authentication.
The authd-oidc broker only supports the device code flow, where the user visits a URL and enters a code to complete authentication.
Restart the broker
When a configuration file is added you have to restart authd:
sudo systemctl restart authd
When the configuration of a broker is updated, you also have to restart the broker:
On Ubuntu 26.04 or later, you can restart the broker and print its logs with:
sudo systemctl restart -v snap.authd-msentraid.authd-msentraid.service
On earlier Ubuntu versions, use:
sudo systemctl restart snap.authd-msentraid.authd-msentraid.service
sudo systemctl status snap.authd-msentraid.authd-msentraid.service
On Ubuntu 26.04 or later, you can restart the broker and print its logs with:
sudo systemctl restart -v snap.authd-google.authd-google.service
On earlier Ubuntu versions, use:
sudo systemctl restart snap.authd-google.authd-google.service
sudo systemctl status snap.authd-google.authd-google.service
On Ubuntu 26.04 or later, you can restart the broker and print its logs with:
sudo systemctl restart -v snap.authd-oidc.authd-oidc.service
On earlier Ubuntu versions, use:
sudo systemctl restart snap.authd-oidc.authd-oidc.service
sudo systemctl status snap.authd-oidc.authd-oidc.service
Configure login timeout
By default on Ubuntu, the login timeout is 60s.
This may be too brief for a device code flow authentication.
It can be modified by changing the value of LOGIN_TIMEOUT in /etc/login.defs.
Configure the authd service
The authd service is configured in /etc/authd/authd.yaml.
This provides configuration options for logging verbosity and UID/GID ranges.
Configure password quality
You can change authd’s local password policy to ensure that users always set strong passwords.
If your mobile device management (MDM) solution includes a compliance check for the passwords of authd users, you may also need to configure authd’s password policy so that it matches that of the MDM.
authd depends on the libpwquality library, which supports configuring password
quality.
Note
This policy applies only to local passwords created or changed through authd. To reject weak Entra ID passwords, configure the tenant password policy. See Cached Entra ID passwords in the security overview.
To configure the local password policy for authd, create a drop file in
/etc/security/pwquality.conf.d/.
This will override the default values in /etc/security/pwquality.conf.
First, create a directory for the custom configuration file:
sudo mkdir -p /etc/security/pwquality.conf.d/
Then edit the file to add your settings.
sudoedit /etc/security/pwquality.conf.d/99_custom-options.conf
For example, if your policy requires that passwords have a 14 character minimum,
edit the drop file to set the value for minlen:
# This file overrides the defaults set in /etc/security/pwquality.conf
# Refer to the pwquality file for additional configuration options.
# Minimum acceptable size for the new password (plus one if
# credits are not disabled which is the default). (See pam_cracklib manual.)
# Cannot be set to lower value than 6 (default is 8).
minlen = 14
The man pages provide a full list of configuration options for the libpwquality library.